MACHINE QUILTING - Free Motion Adventures
I have had the benefit of a few weeks off between jobs, and have thrown my shoulder into trying new things and learning about new techniques I can share with all of you.
As I was mounting a lot of smaller projects on my quilt frame to finish, I wanted to try out some odd designs inspired by my two free motion heroines:
Angela Walters: http://www.quiltingismytherapy.com and
Karen McTavish: http://www.designerquilts.com
who inspire me with their love of family, quilting, and fitting creativity into their already colorful lives.
This table runner I made with whole cloth center and a cute complimentary border so I could just flex my new ideas onto a negative space. I'm pretty happy with the outcome, and can't wait to see it laundered...as this will enhance the stitching in the center panel with shrinkage and puff up the unstitched areas in the feathers and swirls and larger pebbles. (I use 100% cotton fabrics, and 100% cotton batting so I can achieve the vintage look after the first laundry and experiment with what the shrinkage does to different densities of quilting.)
Yay, mentors. Yay, free time. Yay, experiments and the creative process!!
Wednesday, April 30, 2014
Tuesday, March 18, 2014
COWGIRL BOOT SOCKS TUTORIAL
To honor National Craft Month, and my newly adopted Friesian mare, ZaZou, who has me wearing boots almost every day, this month's tutorial has little to do with quilting!
Saw these walking down the street, and came home and whipped some up. (My daughter is into country line dancing at college, so this will be a fun Easter present when she comes home for Spring Break)
You need:
knee socks that pull up a little taller than your cowboy boots
scraps of ribbon, novelty yarn, lace, rayon seam binding, and other fluttery things...
sparkly buttons, or bits of broken jewelry
a needle and matching thread (button hole twist works well)
To honor National Craft Month, and my newly adopted Friesian mare, ZaZou, who has me wearing boots almost every day, this month's tutorial has little to do with quilting!
Saw these walking down the street, and came home and whipped some up. (My daughter is into country line dancing at college, so this will be a fun Easter present when she comes home for Spring Break)
You need:
knee socks that pull up a little taller than your cowboy boots
scraps of ribbon, novelty yarn, lace, rayon seam binding, and other fluttery things...
sparkly buttons, or bits of broken jewelry
a needle and matching thread (button hole twist works well)
Pick out two sets of items to sew at the back center of each of your socks.
Sew the lace, ribbon, etc together firmly. Add the buttons, also sewn firmly on top. Then attach to your sock with button hole thread if you have it, or doubled thread if you don't.
Scoot a boot! You've got little streamers following you that will stop traffic...and hopefully a stampede.
Happy National Craft Month!! MAKE SOMETHING!!! xo
Friday, March 14, 2014
COUNTDOWN TO NATIONAL QUILT DAY!!!
A few more memory lane quilt favorites...
Butterscotch Busy Bee panel quilt, with dense and gorgeous bee design machine embroidery and all over stipple free motion quilting on a domestic construction machine.
A special Bridal Garden Path neutral quilt with extensive machine embroidery in the central panel element. Lap Quilt size.
A musical embroidery quilt for a music student's dorm room, bordered in novelty fabric and coins, and each corner with an additional machine embroidered element.
Landscape art quilt for my mom. It now hangs in my dad's home after her passing. Machine embroidered flora and fauna on loose edge appliquéd batik elements. Heavily free motion quilted to match design elements...clouds, bark, plants, grass.
Small banner quilt with Curlz machine embroidery and a three dimensional bow and trims...lighting the way to a special day.
I have a fast and fun tutorial planned for the upcoming days of National Craft Month, so please check back...
Happy Sewing!!!
Thursday, March 13, 2014
MARCH IS NATIONAL CRAFT MONTH!
MARCH 15TH IS NATIONAL QUILT DAY!!
In honor of each, I wanted to do a round up picture post of some of my favorite projects.
MARCH 15TH IS NATIONAL QUILT DAY!!
In honor of each, I wanted to do a round up picture post of some of my favorite projects.
Baby Tatum's Circus Horse (quick and easy) with machine embroidery and name and birthdate embroidered, then bordered and free motion quilted for a fast but super fun project.
Jelly Roll Race Tablerunner Project on my YouTube Channel Vlog. One Jelly Roll made a quilt that was then sliced into three table runners, bound and gifted for a fast weekend gift project.
Table Top square, stack and whack table runner, hot pads, table mats galore! Projects from my book, Bewitching Fresh Stitching, available autographed at my Etsy store, or online as an eBook or soft cover copy.
Be back in a couple of days with a new National Craft Month quick tutorial! You Cowgirls out there will love it!!!
:) Beth
Tuesday, February 25, 2014
Finished! Tristan Quilt Part 4
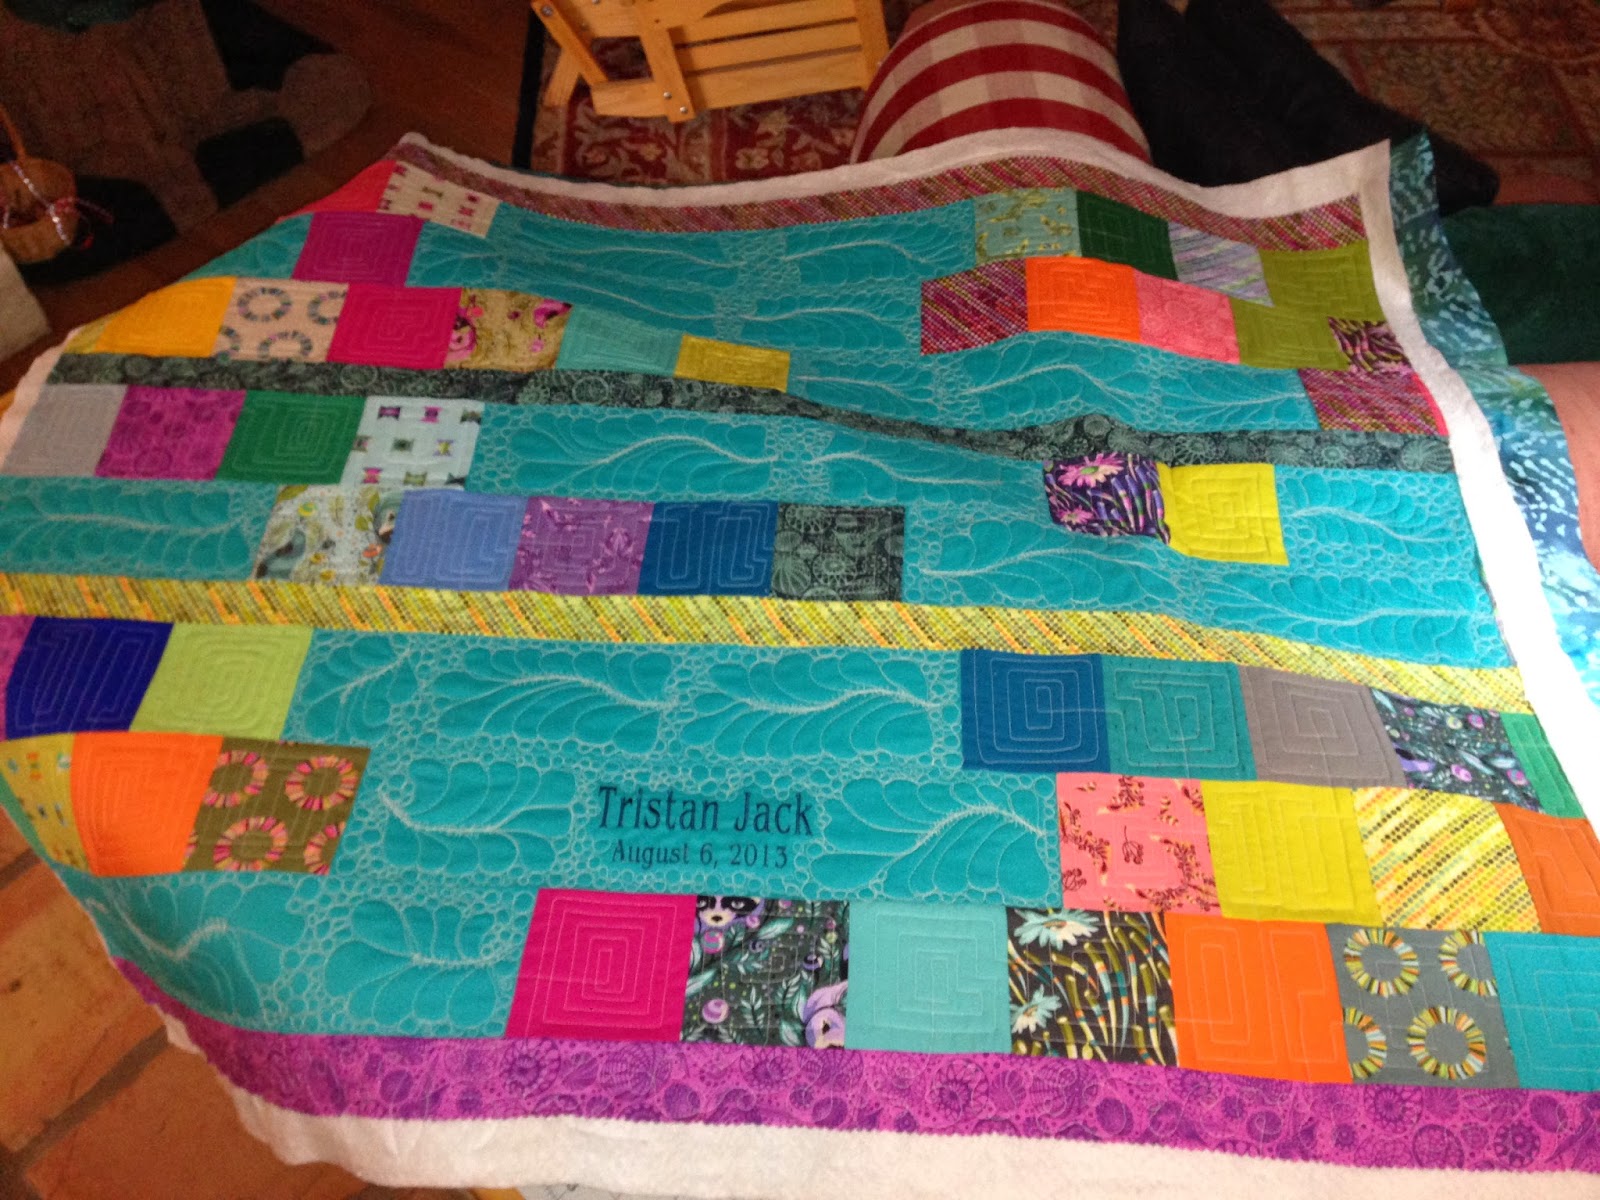
I decided to practice modern shaped feathers and geometric squares for my actual machine quilting design elements. I didn't want the feathers to be feminine or fussy, so I squared them off a little and did a zig zag down the spine centers and surrounded them with pebbles in the plain turquoise sections. Then, in the print squares, I did squares spiraling in and cutting across to the next square in a continual line fashion. It was fun and easy and I could work in bursts when I had 20 minutes here or an hour there. I used cream thread in the bobbin and on top to contrast the embroidery thread in Tristan's name, and so that the designs didn't fade into the fabric color. Also...purely practical...I couldn't find the right shade of turquoise in quilting weight cotton thread, and I didn't want to stray from my all cotton policy, especially in a baby quilt that will be laundered a bunch and (hopefully) used till it's in tatters!!
After the machine quilting was done, I cut the quilt off the frame.
Then I squared up the edges on my cutting mat with my ruler and rotary cutter (it's easier on a smaller quilt like a baby size or a lap rug).
Then I added the binding (you can see instructions for both of these steps in other posts here on my blog, or in videos on my YouTube Channel). For binding strips, I used miscellaneous other bits from the same fabric line (Acacia, by Tula Pink) from the jelly roll I purchased. 2 1/2" strips of adorable!! I made sure to have the binding line up with different colors than the quilt top fabric so it frames the finished product with more color pop.
And I hope Tristan and his family will use this up and wear it out, in the best of health and happiness...here is Tristan's Quilt.
Monday, February 3, 2014
Tristan Quilt Part Three
Making progress on the details of Tristan's bright and sassy quilt. First I auditioned the embroidery, a simple but masculine font with first and middle name, and birth date. I tried motifs but the designs were just too busy for all the bold colors and prints. I used a dark teal rayon thread, so it would show up on the turquoise fabric and not get lost in the quilting.
This is a spare bandana, which I will give to Tristan also to use as a bib, a clean up cloth or a fashion accessory. ;) I keep a stack of colored bandanas to use as last minute embroideries for kids or new puppies. This one is a washed out blue that goes with the tones of the quilt.
Making progress on the details of Tristan's bright and sassy quilt. First I auditioned the embroidery, a simple but masculine font with first and middle name, and birth date. I tried motifs but the designs were just too busy for all the bold colors and prints. I used a dark teal rayon thread, so it would show up on the turquoise fabric and not get lost in the quilting.
This is a spare bandana, which I will give to Tristan also to use as a bib, a clean up cloth or a fashion accessory. ;) I keep a stack of colored bandanas to use as last minute embroideries for kids or new puppies. This one is a washed out blue that goes with the tones of the quilt.
Then I mounted the quilt on the trusty six-needle.
As the embroidery unfolded, I tried several backing fabric prints, and found that the batik in greens and blues was the best match, and went well with the beachy lifestyle of this little family.
So now all the decisions are made, and it's time to get to the quilting. Onto the quilt frame it goes.
If you're working on a home machine, it's the same quilt sandwich. Backing face down, batting next (I always use 100% cotton thin and unbleached batting for baby quilts, because of its natural materials, and it's vintage cozy pucker when it's laundered), then the quilt top face up. Baby quilts and smaller lap quilts are always instantly gratifying since they finish quickly, and are a treasured gift.
Be back shortly with the actual quilting process and designs.
Happy sewing,
Beth
Monday, January 27, 2014
Tristan Quilt Part 2 - Top, Trim, Press
Tristan Quilt Part 2
Had just a little time over the weekend to finish the quilt top, so I wanted to post the pics.
First I finished the piecing (which by the way is not exactly improvisational like modern quilters do it, but is indeed by the seat of my pants with a plan) and then pressed all seams. The great thing about staggering the charm square rows is that I didn't have to devote a lot of time to 'nesting' the seams as each row was added. More on that in a later project.
Then I squared up the edges, just a rough squaring, as the body of the quilt will change again when we do the free motion quilting. Because I staggered the squares, there were some bits to trim off before I mount it on the quilting frame.
Had just a little time over the weekend to finish the quilt top, so I wanted to post the pics.
First I finished the piecing (which by the way is not exactly improvisational like modern quilters do it, but is indeed by the seat of my pants with a plan) and then pressed all seams. The great thing about staggering the charm square rows is that I didn't have to devote a lot of time to 'nesting' the seams as each row was added. More on that in a later project.
Then I squared up the edges, just a rough squaring, as the body of the quilt will change again when we do the free motion quilting. Because I staggered the squares, there were some bits to trim off before I mount it on the quilting frame.
I pressed the seams alternately in and out to avoid bulk when we get to the quilting.
Then I laid it out so you can see the whole thing. There is a turquoise panel toward the lower edge (on the left just above the purple dot strip) that I will be using to machine embroider Tristan's name and birthdate next. Then I'll mount the quilt top on frame and try some new designs in my free motion adventures.
I'll be back in a few days with a progress report. Till then, happy quilting!!!
xo Beth
Subscribe to:
Posts (Atom)